
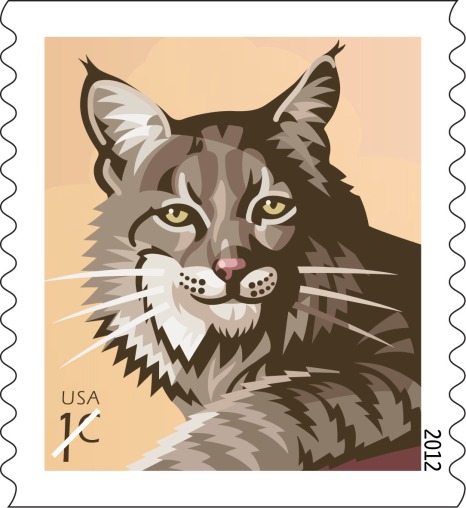
 My grandpa has been collecting stamps since he was in junior high. He has a very specific way to catalog his collection, which means not all stamps from a booklet or sheet need to be saved. As his granddaughter, one of the perks of his stamp collection is that myself and most other family members have ended up with all sorts of stamps. I hardly ever buy stamps as a result. Well, I did buy stamps this week, but only because I was a few cents short on sending a package and needed to have a $5 minimum to use a card. I hardly carry cash, and when I have change, it gets thrown into a jar that goes towards saving for the wedding (those pennies can really add up!). So after the few cents I needed was added to the package, I had the task of selecting which stamps to buy. It was a tough decision, some of them are so pretty! I went with "dogs at work" because I knew it would make my older sister jealous I have these stamps and she doesn't. I'm not a dog person, but even I have to admit those dogs are pretty darn cute! Look at them working...except the one in the top right corner. That one is sleeping on the job! Yes, my sister and I have previously discussed these stamps and how much she likes them. Is it weird that my sister and I looked at various stamp designs on the post office website together over the phone? I think the only stamps she wants more than the "dogs at work" is the 1 cent bobcat stamp. They didn't have those at the post office I went to, though.
Anyway, whenever I get mail from my family half the fun of the letter is looking at which stamps were used on the envelope. And so rather recently, I had an excellent idea to recover the stamps from the envelopes and use them for a decoupage project! I don't have enough stamps for the project I have in mind, but I'll share how to safely remove the cancelled stamps from envelopes with out ripping them. I just happened to receive a package in the mail from my mom today with these gorgeous rose stamps, just in time to make it into today's blog post!

First, cut off the area of the envelope where the stamp is located. I usually just tear the envelope instead, just don't tear through the stamps!

Next, place the stamp (and the bit of envelope that is still attached to it, of course) in hot water. I usually do this in the bathroom sink.

After a few minutes, the adhesive will loosen and you can lift the stamps right off the paper! The self adhesive stamps take much longer than the ones you have to lick, just be patient!

Place the stamps on a paper towel. To prevent them from curling, put another paper towel on top so that the stamps are sandwiched and then put a book on top of that and let it dry for several hours or even overnight.

Here are most of the cancelled stamps I have so far. Aren't they fun and unique? Way better than the liberty bell forever stamps. Forever stamps are great, I fully support forever stamps and the reasoning behind them, but they just aren't as pretty or interesting as using other stamps.

Hopefully this inspires you to start thinking of your own decoupage projects to do with cancelled stamps - or to at least buy a greater variety of stamps. :)


