Showing posts with label Pinterest. Show all posts

Thursday, July 12, 2012

Melted Crayon Painting

The melted crayon paintings have been all over Pinterest for quite some time. I actually made this way back in January. I knew I wanted to do a melted crayon painting, but I wanted it to be something more fun and personal. This was supposed to be a birthday present for my fiancé, but I was so excited about it he ended up getting it super early. 

To make one of these, you need a box of crayons, craft glue, a canvas, wax paper, masking or painters tape, a hair dryer and some newspaper to protect the surrounding area (the crayon tends to splatter). 

Glue the crayons to the top of the canvas in whatever order and color combination you prefer. Make sure that the tips of the crayons are pointing down. While the glue was drying, I got on the computer and played with different fonts until I found one I liked. I printed it on regular printer paper. It took me two tries to get everything sized correctly. 

I got out the wax paper, and traced the letters onto the wax paper. Then, I took masking tape and taped over the letters. I flipped the taped over wax paper over, so I could see the letters I had traced, and cut them out. Then I pulled the wax paper off of the tape, and stuck the tape in the shape of the letters onto the canvas.

By this time, the glue was dry. I propped the canvas against the wall, with newspaper behind and underneath the canvas to catch all the the splattered drops of melted crayons wax. I turned on my hair dryer and watched as the crayons melted and dripped down the canvas. It was a lot of fun to watch. Once I was sure the crayon wax had dried, I carefully peeled off the tape, I did have a little accident with the "T," but otherwise it was perfect! With a little bit of white paint the edges were neatened up. The letters seem to pop right off the canvas. 


This is before it was touched up with the white paint. Maybe if I had used painters tape instead of masking tape the paint wouldn't have been necessary, but I used what was on hand. 


Tuesday, July 10, 2012

Yarn Wrapped Lampshade


See the big rip?
 It's hard not to see it!
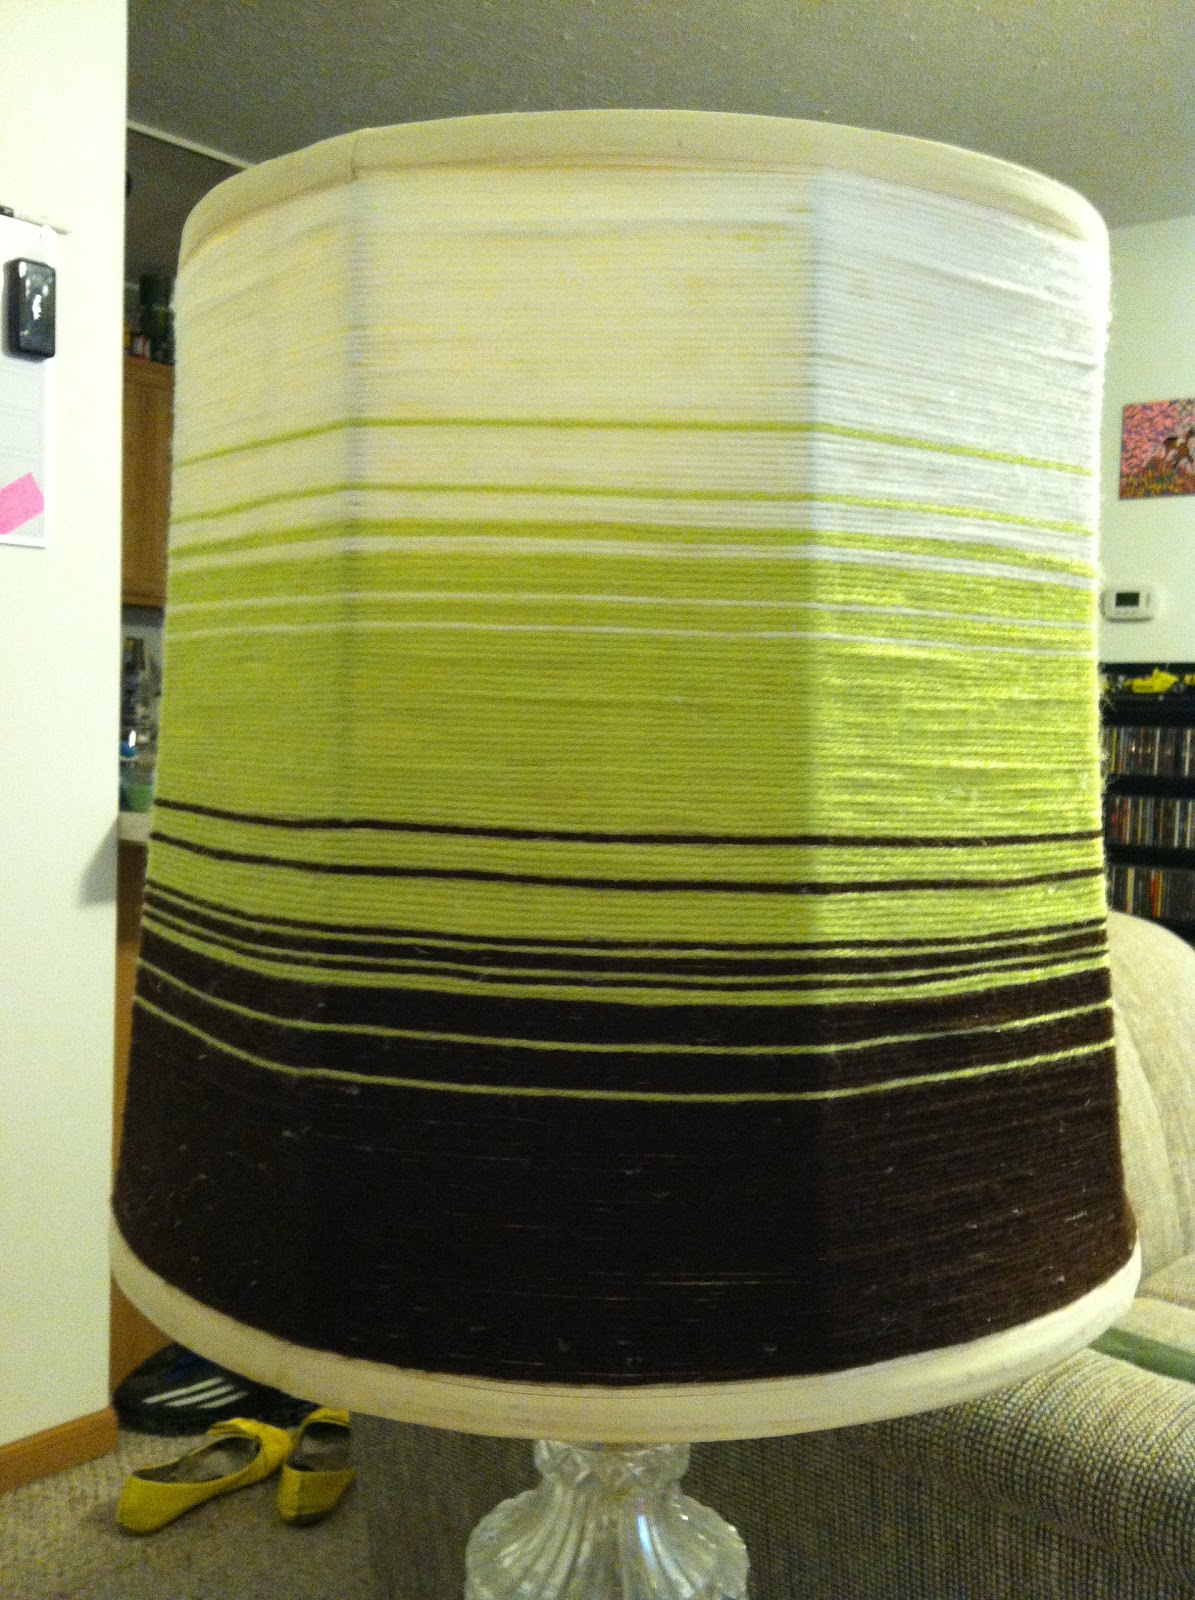
My fiancé and I had this lampshade with a big rip. On Pinterest, I found a tutorial for a yarn ombre lampshade. It looked like a perfect project to revive this poor ripped lampshade and to use up some yarn from my massive stockpile (we actually bought the green because none of the shades of green yarn I had were quite right, but the brown and white I already had). I had a bit of a struggle following the tutorial as stated. It might have to do with the fact that the tutorial used a circular lampshade and the one I have is a hexagon.

 I started off by gluing the strand of brown to one of the sides of the lampshade with my hot glue gun. Then, you wrap the yarn around and around and around...you get the idea. As I wrapped around I periodically glued the yarn to the lampshade. I found that the further along I went with this project the less glue I used per round. I have no specific formula for how I did this - when it seemed like the yarn need to be secured I put a dot of glue on the lampshade and pressed the yarn into it. Sometimes I went back and added more glue if I thought it was needed in certain spots. Make sure you keep the yarn fairly taut, but don't stretch it too tight. 

My fiancé wanted each color to be about a third of the lamp. He even got out a ruler and marked off the lampshade into thirds. A few inches below the first mark I started adding in the green. I did not cut off the brown, because I still wanted to use it so when I was using the green, I kept the brown inside of the lampshade so it was out of the way, and vice-versa when using the brown. I did the same exact thing once I started using the white yarn. 


In the picture to the right, I have just one row of white yarn completed. This is the side with the rip and it is barely visible anymore! Just the very top of it is left to cover. When I still had two colors of yarn attached, the color that I wasn't currently using went behind the other one as it wrapped around the lampshade. I don't think this was the best way to do it. When the lamp is off you can't tell that there is a string behind the outer layer, but when it is turned on the yarn is clearly highlighted. If I ever do this again, I think I'll just cut the strand if I'm moving on to a different color, and glue it back on if I start with that color again. I think it would look better. But that side can be turned so that people don't look at it. The other five sides look great.

Overall, I am very happy with the finished product, and my  fiancé  is impressed. It was an easy project, and only cost a few dollars to complete. There are a few imperfections here and there, but nothing to the point where I feel like I needed to go back and fix. 
The finished lampshade! (Pay no attention to the ragged
 cat tower in the background...one of the cats really
loves it and expresses his love by scratching it to bits. But
 it has saved the furniture so I shouldn't complain!)