 |
| See the big rip? It's hard not to see it! |
My fiancé and I had this lampshade with a big rip. On
Pinterest, I found a tutorial for a yarn
ombre lampshade. It looked like a perfect project to revive this poor
ripped lampshade and to use up some yarn from my massive stockpile (we actually
bought the green because none of the shades of green yarn I had were quite right,
but the brown and white I already had). I had a bit of a struggle following the
tutorial as stated. It might have to do with the fact that the tutorial used a
circular lampshade and the one I have is a hexagon.
I started off by gluing the strand of
brown to one of the sides of the lampshade with my hot glue gun. Then, you wrap the yarn around and around and around...you get the idea. As I wrapped
around I periodically glued the yarn to the lampshade. I found that the further
along I went with this project the less glue I used per round. I have no specific formula for how I did this - when it seemed like the yarn need to be secured I put a dot of glue on the lampshade and pressed the yarn into it. Sometimes I went back and added more glue if I thought it was needed in certain spots. Make sure you keep the yarn fairly taut, but don't stretch it too tight.

My fiancé wanted each color to be about a third of the lamp. He even got out a ruler and marked off the lampshade into thirds. A few inches below the first mark I started adding in the green. I did not cut off the brown, because I still wanted to use it so when I was using the green, I kept the brown inside of the lampshade so it was out of the way, and vice-versa when using the brown. I did the same exact thing once I started using the white yarn.

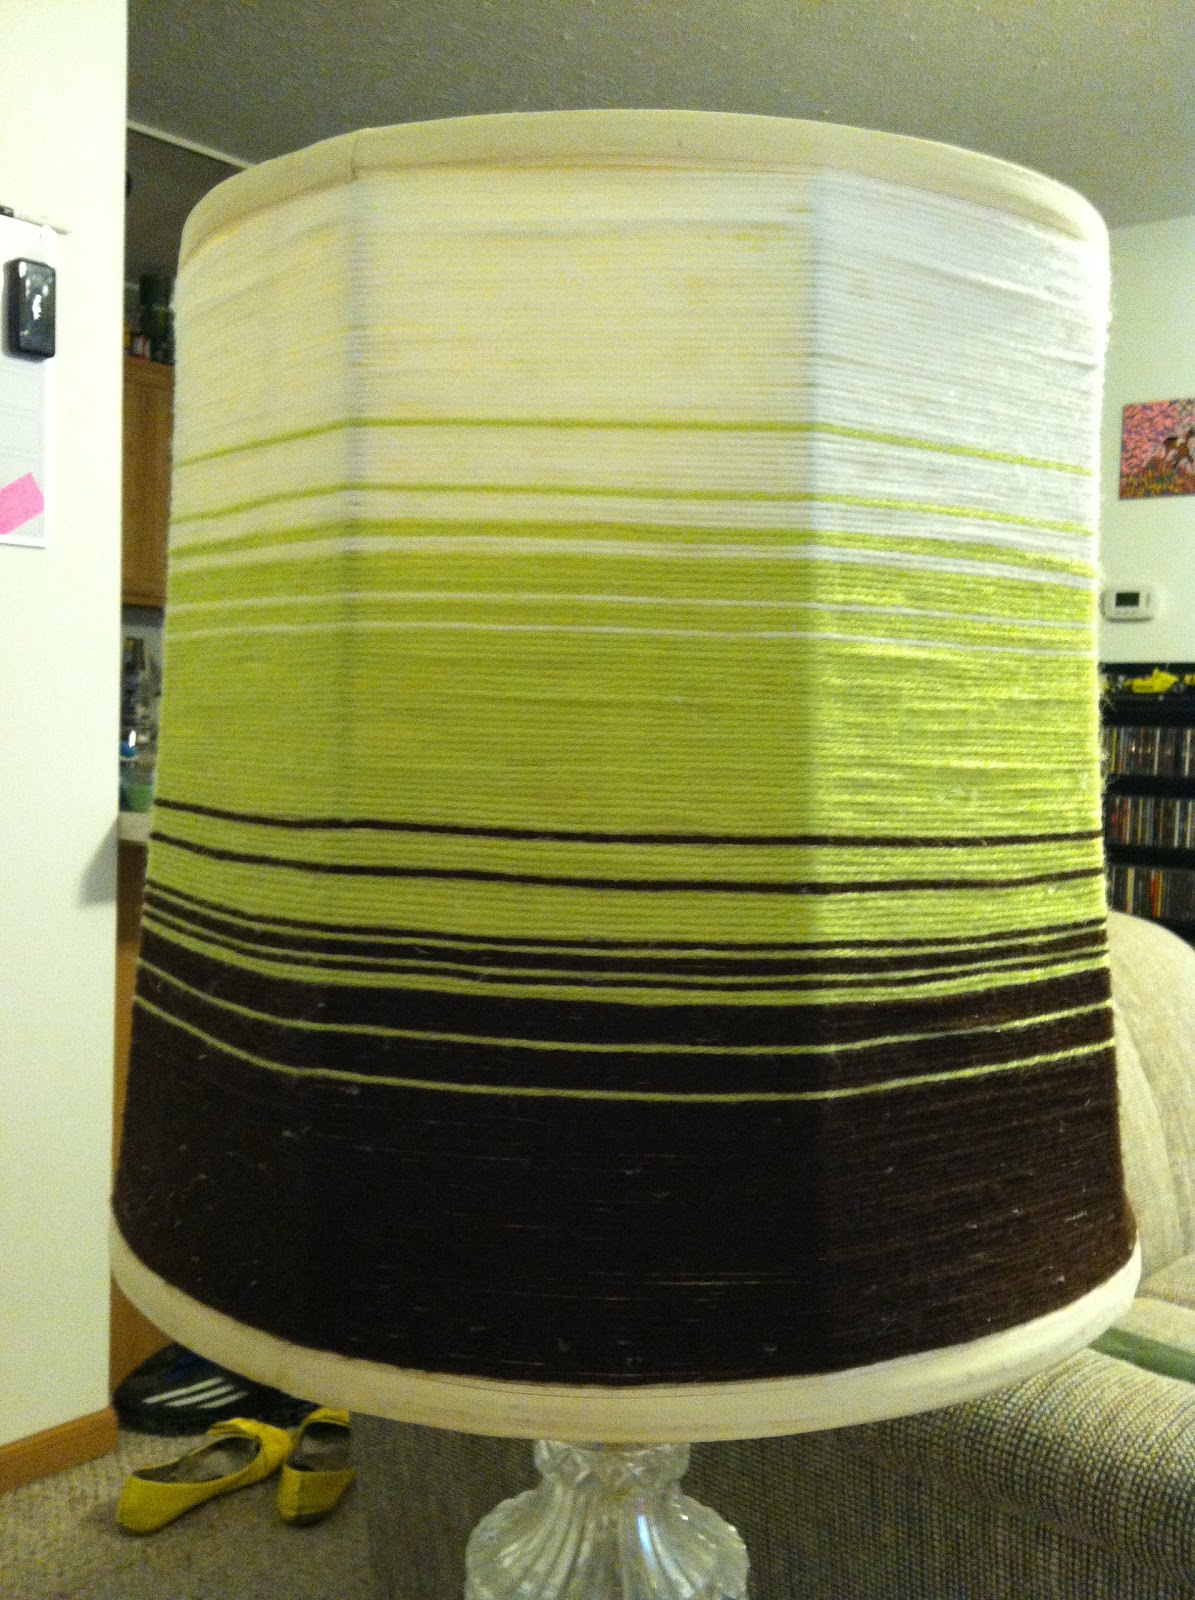
Overall, I am very happy with the finished product, and my
fiancé is impressed. It was an easy project, and only cost a few dollars to complete. There are a few imperfections here and there, but nothing to the point where I feel like I needed to go back and fix.
 |
The finished lampshade! (Pay no attention to the ragged
cat tower in the background...one of the cats really
loves it and expresses his love by scratching it to bits. But
it has saved the furniture so I shouldn't complain!)
|
No comments:
Post a Comment